Why should I learn it?
As part of the same-colored Bishops concept that you’ve already seen if you are reading this guide from start to finish, this second position illustrates a more complicated maneuver that the side with the pawn must resort to. It’s useful to understand the dynamics of Bishop vs Bishop in such cases.
When do I use it?
In Bishop vs Bishop endings where you have the extra pawn or pawns, and where both Bishops move in the same-colored squares.
Link to Practice Problems
Same-colored Bishops: Part 2 problem #1
Step-by-Step Guide on Same-colored Bishops: Part 2
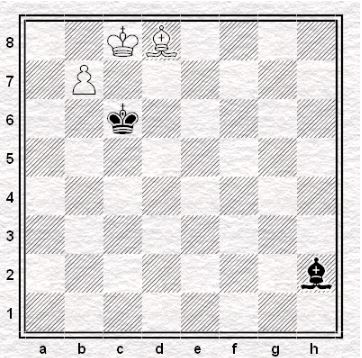
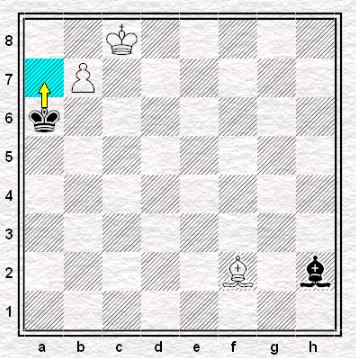
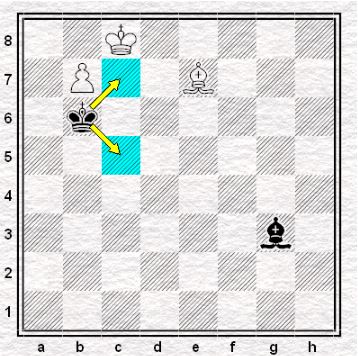
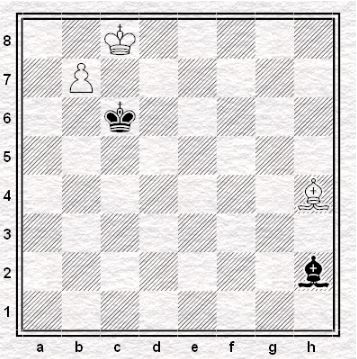
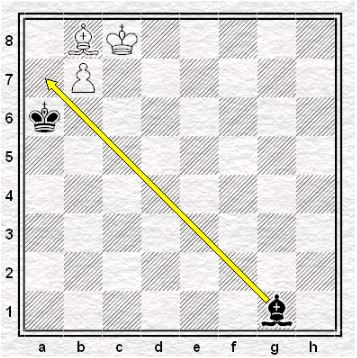
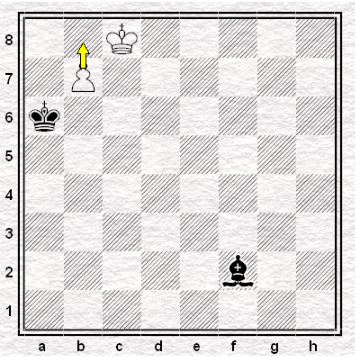
It is White to move. The path to victory is a longish one, but the idea is that White must place his bishop on b8 in order to control the long diagonal. Black’s king has to deal with threats of bishop to a7 and then b8, as well as bishop to c7. A clever zugzwang forces Black’s bishop out of his confinement on h2, which gives white the chance to maneuver with gain of tempo.
- Bh4
At first glance, White’s plan here is obvious — to bring his bishop to b8 via a7. However, there is a more sinister plan attached along with it, this move also baits the Black king into leaving the c6 square and thus forcing Black into a zugzwang later on.
- …Kb6
Black plans to take control of a7 before White’s bishop could reach it.
- Bf2+
White goes on with the “obvious” plan anyway. There is only one square for the Black king if it wants to prevent White’s bishop from jumping into a7.
- …Ka6
Controlling the a7 square.
- Bc5
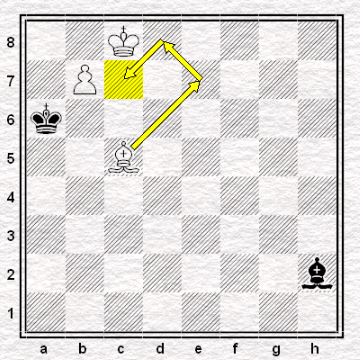
White now goes for a different approach, or not. This is just an extension of the real plan. White is looking to bring its bishop into c7, thus protecting the pawn’s advance into b8. This maneuver would then bait the Black bishop into leaving the h2 square later on.
- …Bg3
Since Black’s king is still taking control of a7, Black is then forced to move its bishop. This is important for White since it could now challenge the Black bishop via h4.
- Be7
It seems that White’s bishop will be unstoppable unless Black’s king goes back into c6.
- …Kb6
Black’s king now tries to take control of c7 and c5 to stop White’s bishop from using them.
- Bd8+
Still continuing with the plan (and the hidden plan).
- …Kc6
Moving away from check while preventing the White bishop from going into b6 or c7.
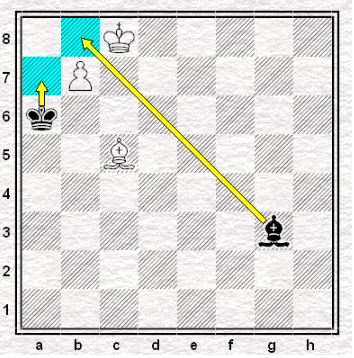
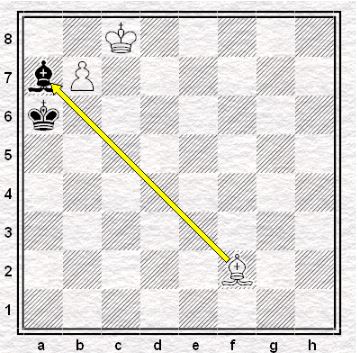
- Bh4!
This is the hidden plan!
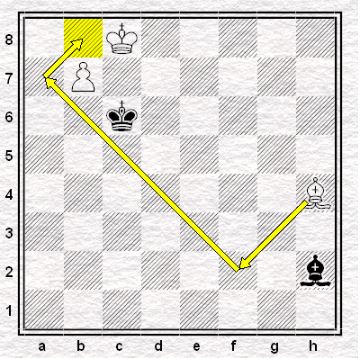
After those slew of seemingly useless moves that the White bishop has done, Black has unknowingly danced in the palm of White’s hand. By (1) forcing the Black king to protect a7 earlier, (2) it then resulted in the Black king into not leaving a7 temporarily (3) thus making the Black bishop leave the safety of h2 and be prone to attacks from the d8-h4 diagonal.
All of that for what? For White’s bishop to once again go for b8 via a7. But with no more hurdles. If the Black bishop takes on h4 then the pawn would just go on to promote itself.
- …Bh2
Moving the Black bishop away from harm while still preventing White from promoting.
- Bf2

Gunning for a7, like we said earlier. The only difference from the start is that we have forced Black into a zugzwang that prevents them from stopping the White bishop the second time.
- …Kb5
Black tries to go back into a6 once again but it’s too late.
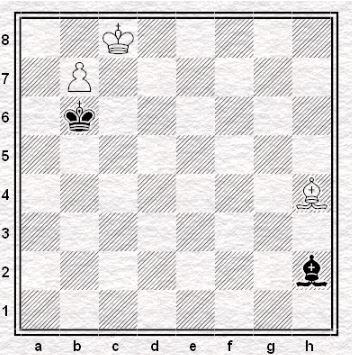
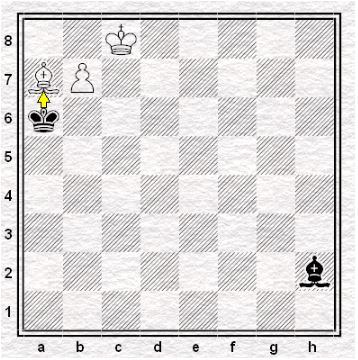
- Ba7

White would now soon control the b8-h2 diagonal.
- …Ka6
Threatening to take the bishop.
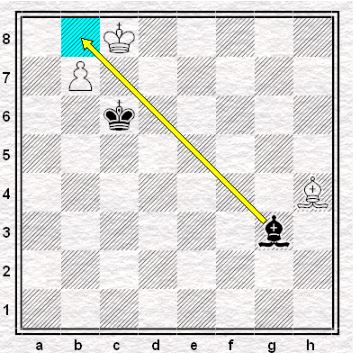
- Bb8
The White bishop ignores the Black king and stares down at the Black bishop.
- …Bg1
Black is now looking to prevent White’s promotion via a7.
(9. …Bxb8? just makes it easier for White to promote the pawn. 10. Kxb8 Kb6 11. Kc8 Ka7 12. b8=Q+)
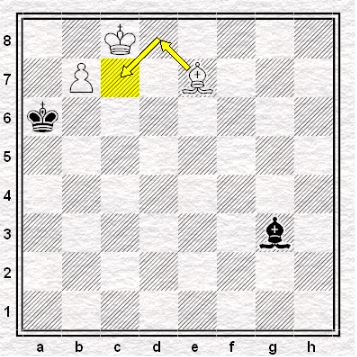
- Bg3
Making way for the pawn.
- …Ba7
It’s now Black’s turn to go into a7. But White has a move that deflects Black’s bishop from guarding the pawn.
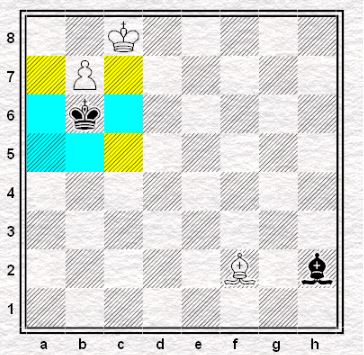
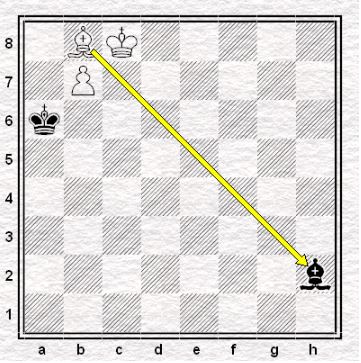
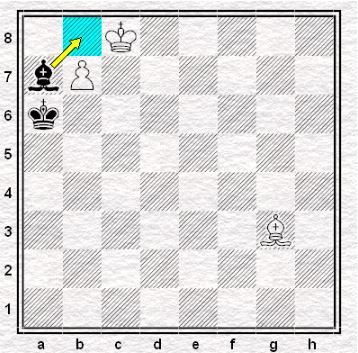
- Bf2!
The Black bishop no longer has safe squares to retreat to!
- …Bxf2
If Black doesn’t take, then White will. But by doing so, the pawn is now safe for promotion.
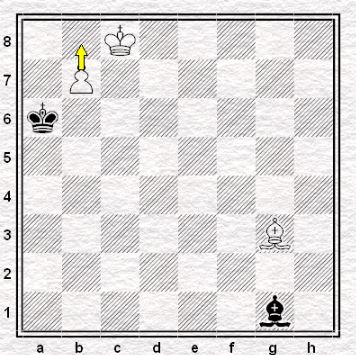
- b8=Q
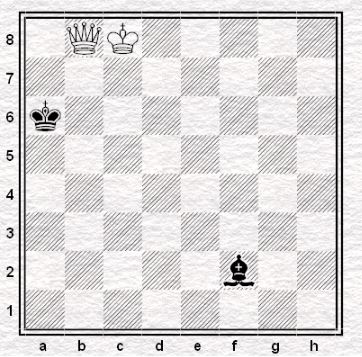
Thanks to White’s hidden plan, the pawn has successfully promoted into a queen.