Why should I learn it?
Corresponding squares are one of the most fascinating aspects of King and pawn endings, and if you’ve done enough study in the more elementary aspects of such endings—meaning you know your opposition, outflanking, mined squares, etc.—, then you deserve to learn this one. Understanding corresponding squares will allow you to make short work of even the most complex endgames, where the Kings are far apart and there are no obvious plans.
When do I use it?
Corresponding squares are an offshoot of the key-square concept. When you detect the key square, but the Kings are too far from them, it’s important to establish a chain of related key squares through which you can make your way to the “key key squares” without losing the advantage.
Link to Practice Problems
Corresponding squares problem #1
Step-by-Step Guide on Corresponding squares
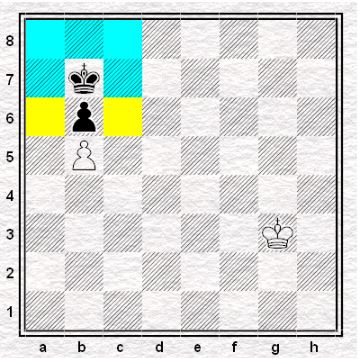
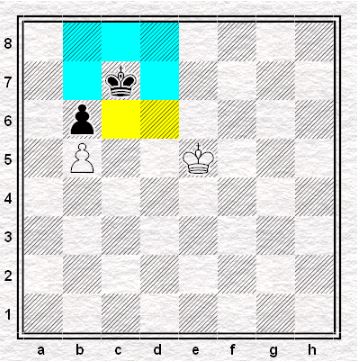
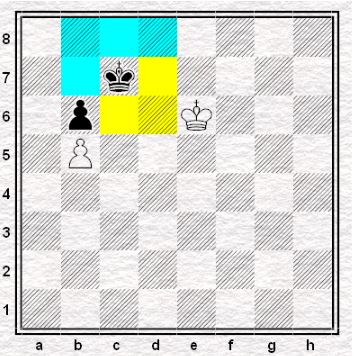
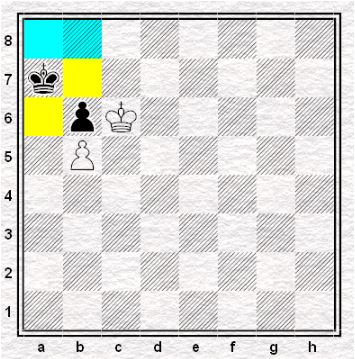
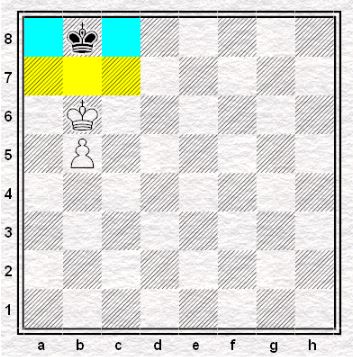
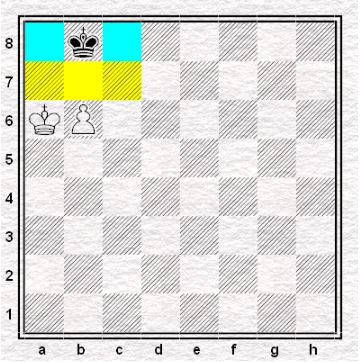
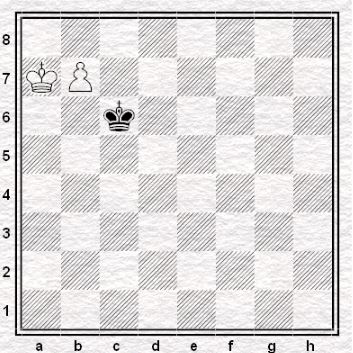
White to move. The b6 pawn’s critical squares are c6, d6, and e6. In order to win it, White must figure out a way of getting into any of those squares.
- Kg3

Getting close to the pawns.
- …Kb7
Looking to beat the king to it.
- Kf4
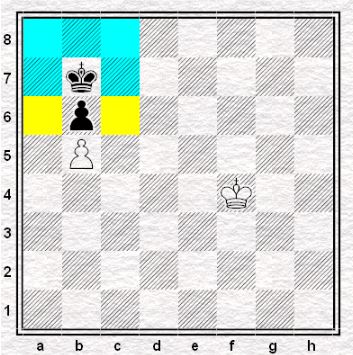
Getting closer.
- …Kc7
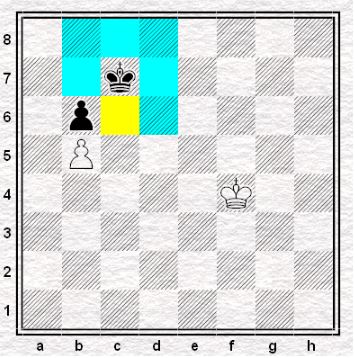
Thanks to White’s pawn, the Black king does not have access to c6.
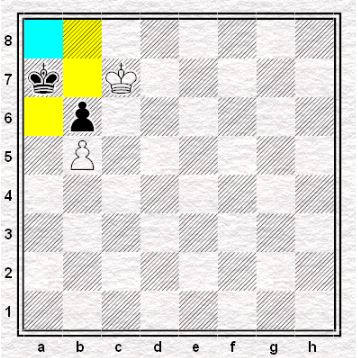
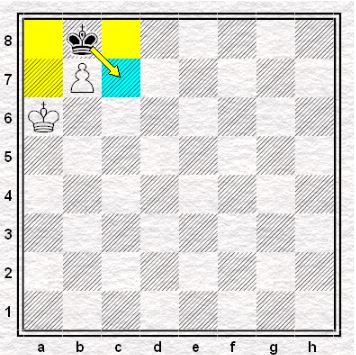
- Ke5
After Ke5, the Black king is now unable to step on the 6th rank.
- …Kd7
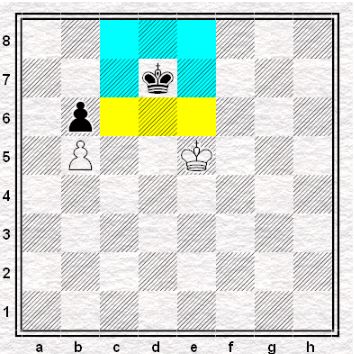
Trying to block the White king.
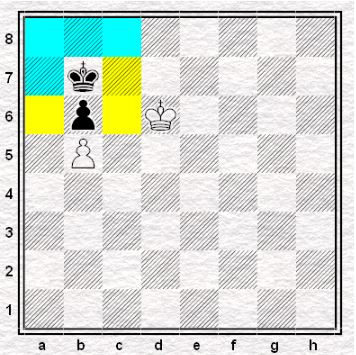
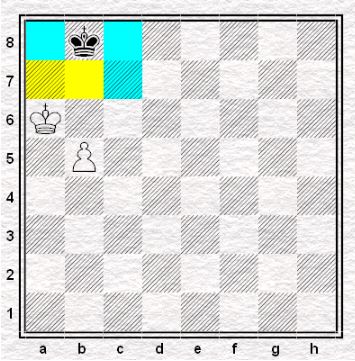
- Kd5
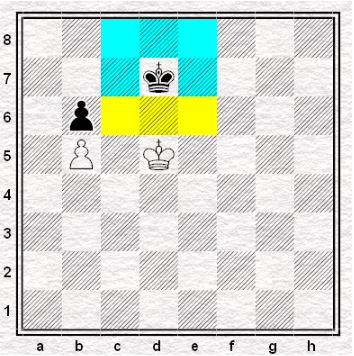
Gaining tempo. White would be able to jump into either of the critical squares c6, d6 and e6 on the next move.
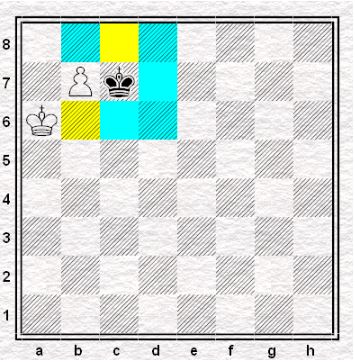
- …Kc7
Preventing the White king from jumping to c6. But by doing so, White now has access to e6.
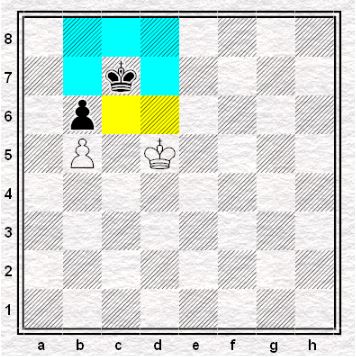
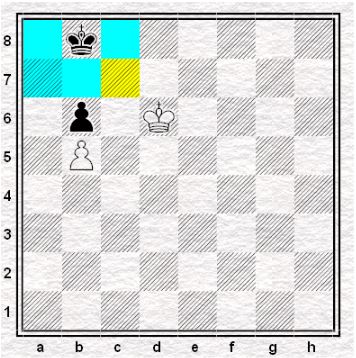
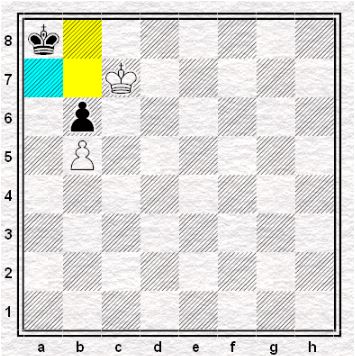
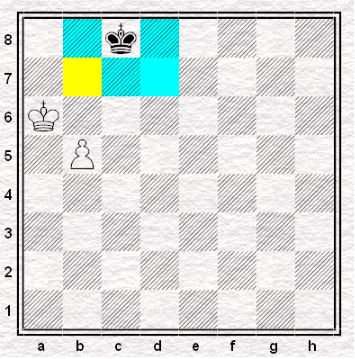
- Ke6
Since White controls the squares c6, d6, and d7, Black would be forced to withdraw further, letting the White king to come closer to the pawns.
- …Kb7

Still sticking close to its pawn.
(5. …Kd8 6. Kd6 Kc8 7. Kc6 Kb8 8. Kxb6)
(5. …Kc8 or …Kb8 is met by 6. Kd6 as well)
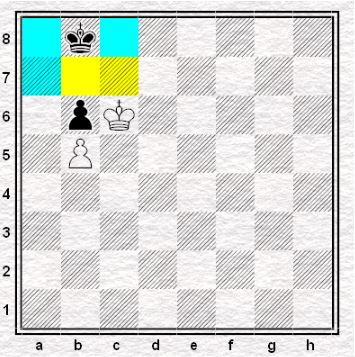
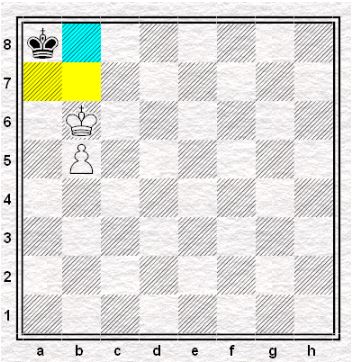
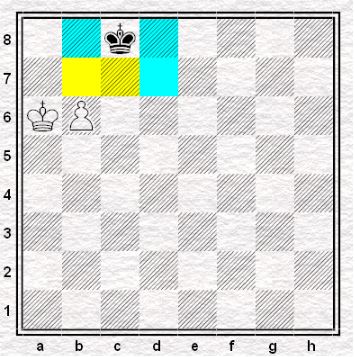
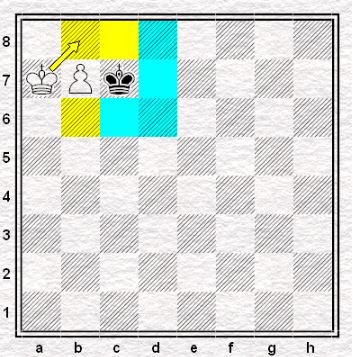
- Kd6
Forcing Black to retreat further into the edge.
- …Kb8
Now the White king is able to charge the enemy pawn.
- Kc6
Threatening to take the pawn.
- …Ka7
Making effort to protect its last remaining pawn. But White would still be able to snatch it with its next move.
- Kc7
Now, the Black king has nowhere to go but a8.
- Ka8
This move is forced. Now, the pawn is free for the taking.
- Kxb6
Eliminating the opposition’s blockade.
- …Kb8
Again, forced.
- Ka6
Freeing up the pawn’s path.
(10. Kc6 is also winning)
- …Kc8
No matter what Black does here, the White pawn should still be able to promote.
- b6
Onwards!
(11. Ka7 is also winning since it would secure the pawn’s path)
- …Kb8
Trying to block the pawn.
- b7
The only winning move. After b7, the Black king now only has the c7 square to retreat to.
Any king move would be met by 12. …Kb7 and it becomes a draw.
- …Kc7
The only move.
- Ka7
Securing the b8 square for the pawn.
- …Kc6
Now that Black has failed to stop the pawn, it starts to flee.
- b8=Q
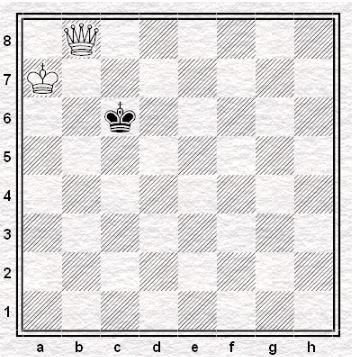
The pawn transforms into a queen and a single king shouldn’t be able to escape it.