Why should I learn it?
If you have an excellent understanding of most basic endings, and if you’re at an advanced level in chess in general, then it’s worth taking the time to learn this checkmate. Much like the last example, this is a very rarely-occurring ending, but one that you cannot play to completion if you’ve never studied it and if you ignore the correct maneuvers. As a bonus to this problem, it goes a long way to teaching you the best cooperation positions for Bishop and Knight—useful knowledge that is sure to spill out to other phases of the game.
When do I use it?
When you reach an ending where there are no pawns to maximize your Bishop and Knight-advantage, the only way forward is to bite the bullet and attempt the checkmate with these two pieces. That’s when you have to make sure you actually can push the opposing King to the right corner (the one of the same color as your Bishop) and effect that checkmate.
Link to Practice Problems
King, Bishop and Knight vs King problem #1
Step-by-Step Guide on King, Bishop and Knight vs King
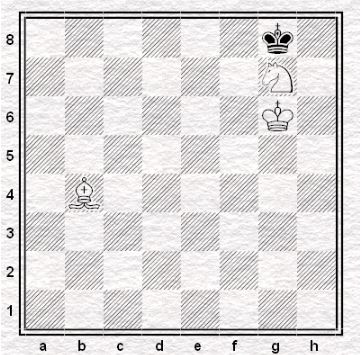
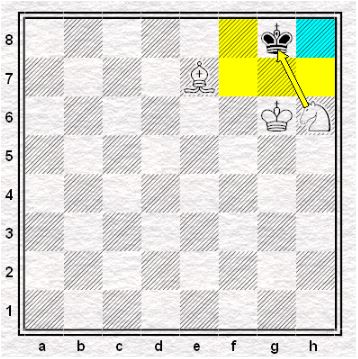
It is White to move. This position is highly ideal for White since the Black king is already trapped at the 8th rank, and even close to the corner to boot.
- Nf5
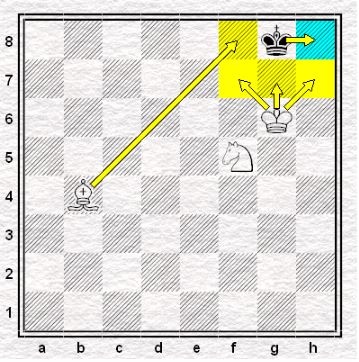
White’s plan is to bring the knight into h6 later on. Thanks to White’s king and bishop, the Black king only has the corner to retreat to.
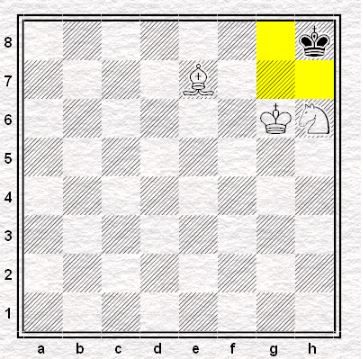
- …Kh8
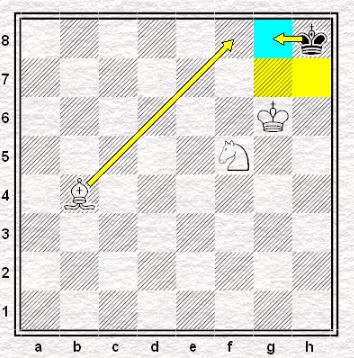
Black still only has one square to retreat to, and that’s good since White would not want a stalemate. Since White’s king and knight shouldn’t be moved at the moment, White needs to move its bishop while making sure that it still controls the f8 square.
- Be7
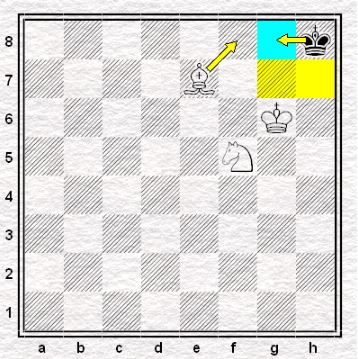
Anywhere along the a3-e7 diagonal is fine. Bringing the bishop to f8 just lets it to be threatened by the enemy king.
- …Kg8

Forced.
- Nh6
The knight could now deliver a check.
- …Kh8
The only move.
But now, the Black king no longer has anywhere to retreat to. Thankfully, White has a move prepared for just that.
- Bf6#
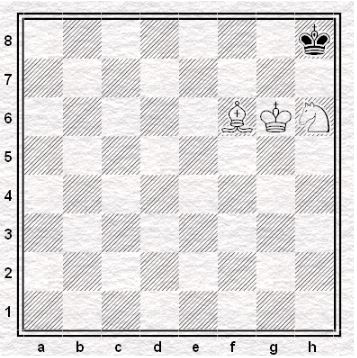
Checkmate.