Why should I learn it?
This has everything to do with the previously-discussed pawn vs Knight dynamic. In more than one way, it’s merely an extension of that concept. Understanding this concept will allow you to make short work of the opponent’s Knight when the opportunity presents itself, while avoiding such pitfalls for yourself in Knight endings.
When do I use it?
In most Knight vs pawn endings, the possibility of sacrificing your Knight in order to reach a winning pawn vs Knight ending is always present. That’s when this concept comes into play.
Link to Practice Problems
King and pawn vs King and Knight problem #1
Step-by-Step Guide on King and pawn vs King and Knight
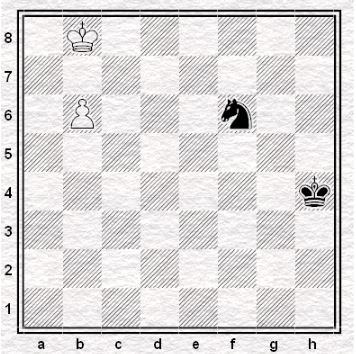
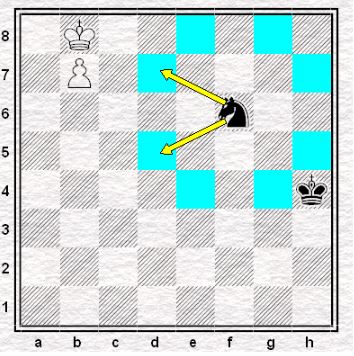
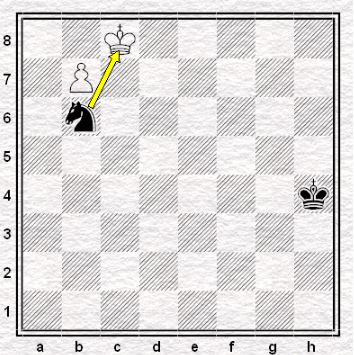
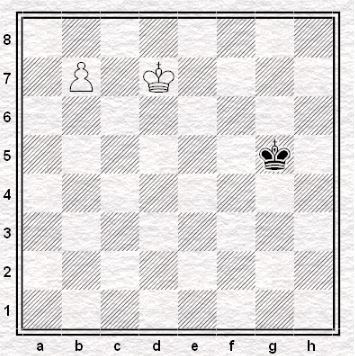
White to move. Analyze the squares that the knight has access to.
- b7!
Onwards!
Just pushing the pawn leaves black no good options. Every square that the knight could jump onto won’t help it catch the pawn. Unless White blunders that is.
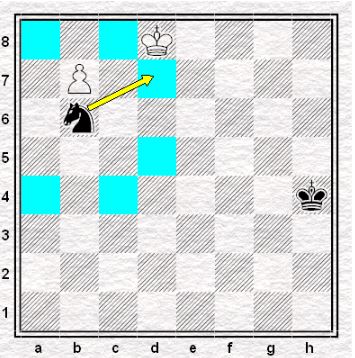
- …Nd7+
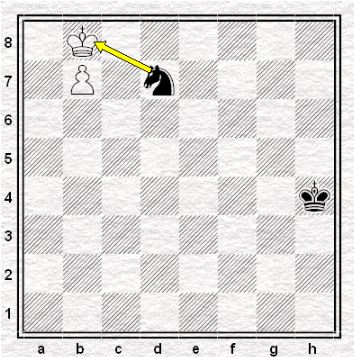
Trying to control b8.
(1. …Ne8 is met by 2. Ka7)
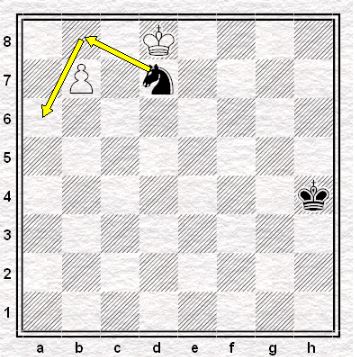
- Kc8
Threatening to take the knight. Thanks to this move, White is forcing the knight to leave alone the b8 square.
(2. Kc7?? would just lead to a draw after 2. …Nc5 3. b8=Q Na6+!!, taking the promoted pawn on the next move.)
- …Nb6+
Now the knight is trying to delay the pawn’s advance by checking the king. However, White has to simply move away without blocking b8.
- Kd8
Making it so that it is unsafe for the knight to jump to d7, preventing Black from stopping the pawn.
(3. Kc7 is also winning but it lets the knight check the king one more time)
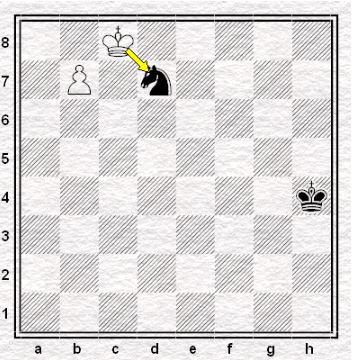
- …Nd7
Hoping that White is stupid enough to not take the knight. Its goal is to jump to a6, making time for the Black king to arrive and help.
- Kxd7
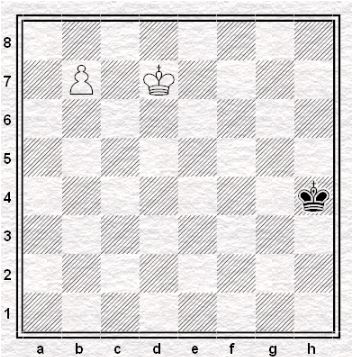
Taking a free piece feels good, right?
- …Kg5
Now that the knight is gone, the Black king springs into action. Not that it matters.
- b8=Q
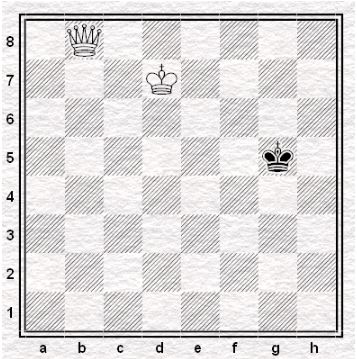
Thus the pawn successfully promotes itself into a queen.