Why should I learn it?
Sometimes you can be playing an endgame where you only have a naked King against Bishop, pawn and King of your opponent’s—and still draw. This happens when the opponent’s pawn is a Rook pawn, your King is able to block it, and the opponent’s Bishop has no control over the promoting square.
On the other hand, if you are the stronger side, you want to avoid such endings. You want to have the Bishop that controls the promoting square, in which case the victory only takes a little maneuvering. Case in point.
When do I use it?
All kinds of Bishop and pawn vs Bishop and pawn endings could lead to one such position, once the opponent is forced to sacrifice his Bishop for one of your pawns that threatens to promote. In these cases, you should be aware of the color of your Rook pawn’s promotion square.
Link to Practice Problems
King, Rook pawn and Bishop vs King problem #1
Step-by-Step Guide on King, Rook pawn and Bishop vs King
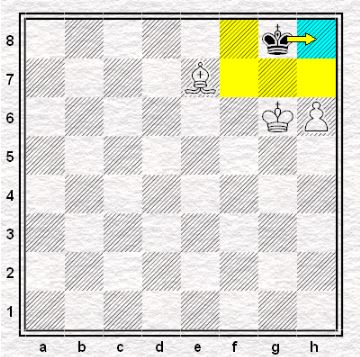
White to move. Here you don’t even have to bother about promoting a new Queen; the material on board is enough for the kill. As you can see, the Black king only has h8 to retreat to.
Remember, a bishop could only mate on the corner square of the same color. Thankfully for White, bringing the opposing king to h8 is easy.
- h7+
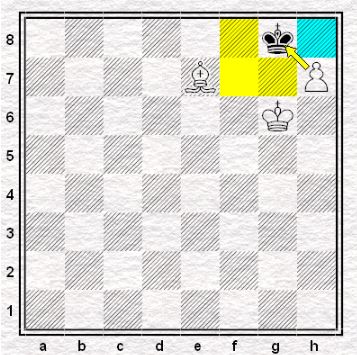
Check. Thanks to the king and bishop, the only square that the enemy king could retreat to is h8.
- …Kh8
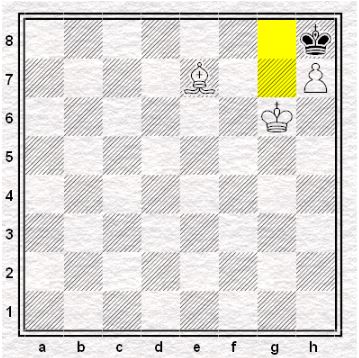
Forced.
- Bf6#
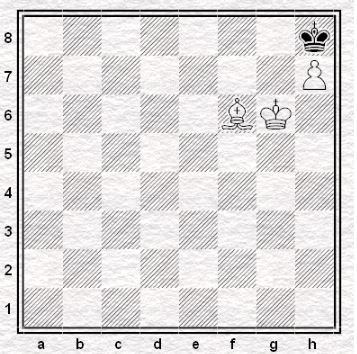
Checkmate.