Why should I learn it?
OK, if we’re honest? Mostly for fun, because this is such an esthetically pleasing endgame! But also because it’s important to be aware that such endgames are possible, as it comes as a decidedly cool bonus when you play any kind of Knight and pawn ending. You know that thing about it being impossible to win when you only have a King and Knight against King? Well, it’s true, but in some very specific cases, if your opponent has an extra pawn—that just about could be his downfall!
When do I use it?
Quite frankly, it’s unlikely you’ll ever find yourself in need of this knowledge. But if your opponent has only a Rook pawn and if you have a Knight and if your opponent’s King is in front of his Rook pawn and if your King is close enough to be blocking his King from leaving the pawn’s file… well, if all your lucky stars do align, you get to achieve a very, very satisfying finish.
Link to Practice Problems
Knight vs Rook pawn problem #1
Step-by-Step Guide on Knight vs Rook pawn
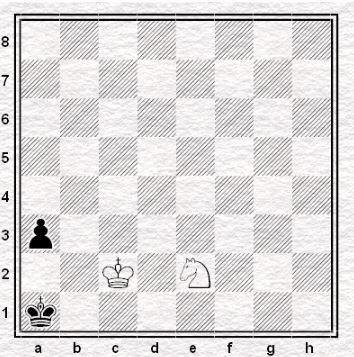
It is White to move. Rook pawns are generally harder to promote because a king alone would be hard-pressed to pave the way since the edge limits the squares it could go to. In this position, White had successfully caged the Black king into the a-file and thus would be able to force a mate in just two moves.
- Nc1!
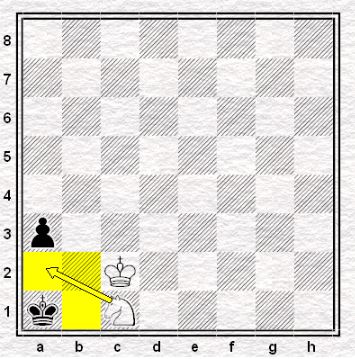
Thanks to this move, the Black king no longer has squares to retreat to. In other words, Black would now be forced to trap its king by moving the pawn.
- …a2
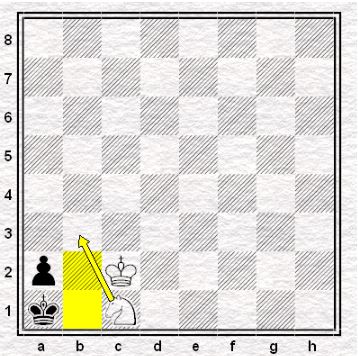
The only move since the king has nowhere to go. Unfortunately for Black, the White knight would now be able to jump to its promised square to deliver the mate.
- Nb3#
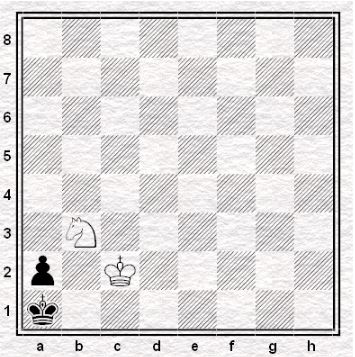
Checkmate.