Why should I learn it?
Corollary to the principle of opposition and outflanking is that of mined squares, only one of the different aspects of another concept—key squares—that will be discussed below. It’s important to understand it because it tells you what to avoid, and how to draw your opponent into a trap. Mined squares often modify the simple concept of opposition, so that you should be aware of any such squares present at all times.
When do I use it?
Most often in positions where opposing pawns are locked (i.e., blocking each other) and the Kings fight for access to them. In these situations you must avoid stepping on a mined square, which will ensure your opponent (if he gets it right) can find his way to the pawn chain under favorable circumstances. On the other side of the coin, your opposition calculations will naturally be aimed at leading the opponent to step himself on one of the mined squares.
Link to Practice Problems
Step-by-Step Guide on Mined squares
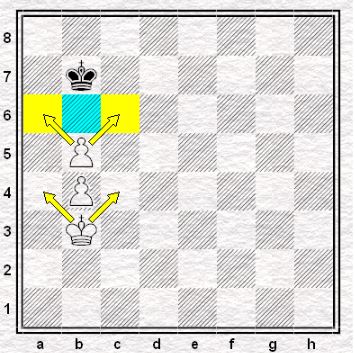
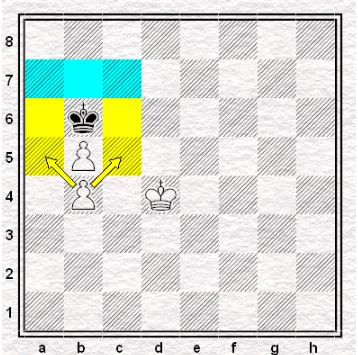
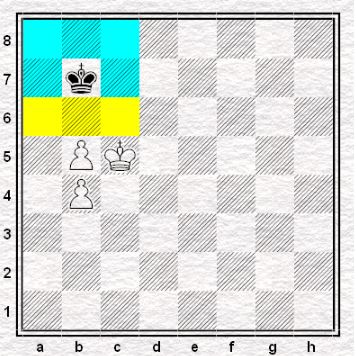
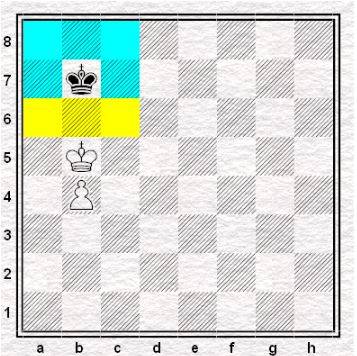
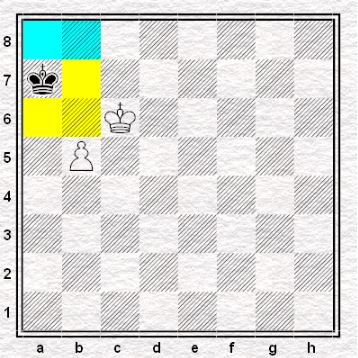
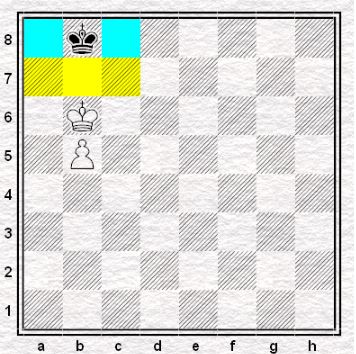
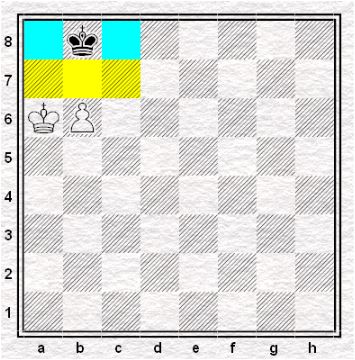
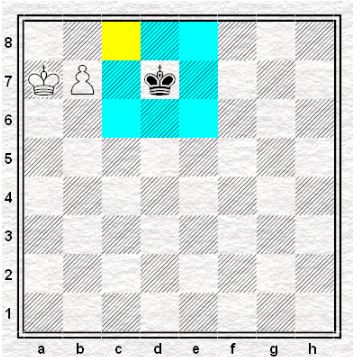
What is a mined square? From the term itself, it is a dangerous square for the king to step onto. In the diagram, the mined squares for White are a4 and c4. If the White king moves into any of those, the Black king would then respond with Kb6, snatching our b5 pawn on the next move.
In order to defuse those mined squares, you have to use your extra space — since the black King also has to keep an eye on your b-pawns — in order to go around and enter the c4 square only when black no longer has access to b6. Then maneuver in a similar fashion to the last instance, sacrificing one pawn in order to reach a winning position.
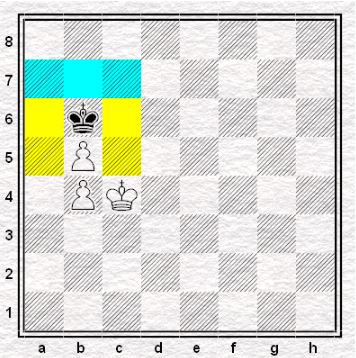
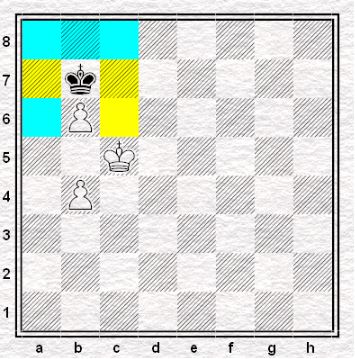
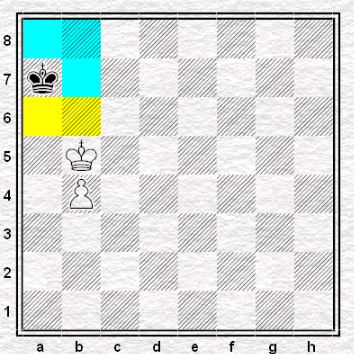
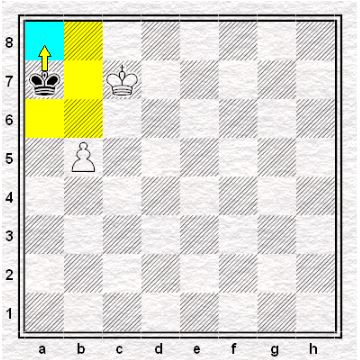
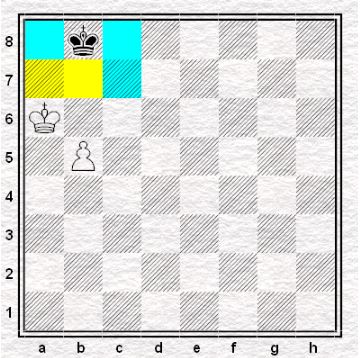
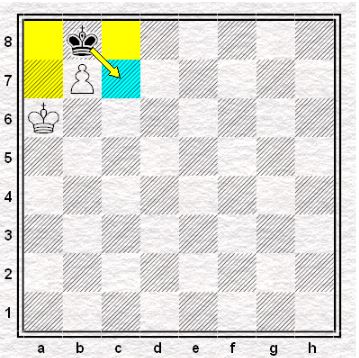
1. Kc3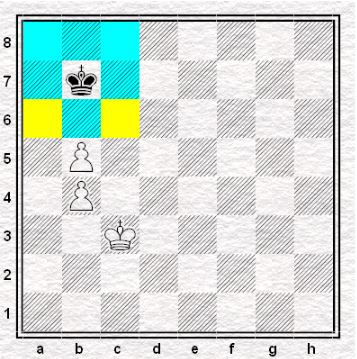
The only move that makes progress. This lets the White king to jump into d4 or c4 depending on Black’s next move. If the Black king steps on b6 then the c4 square is no longer mined.
- …Ka7
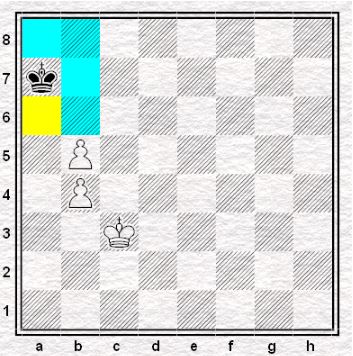
Preparing to jump into b6 in case the White king moves with 2. Kc4
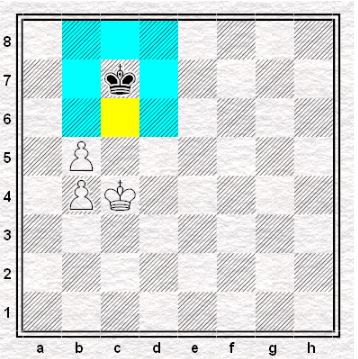
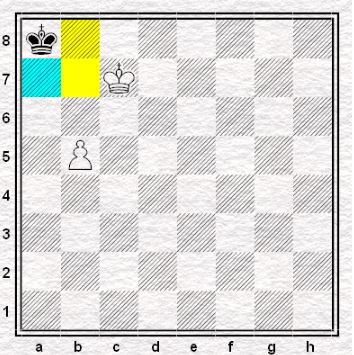
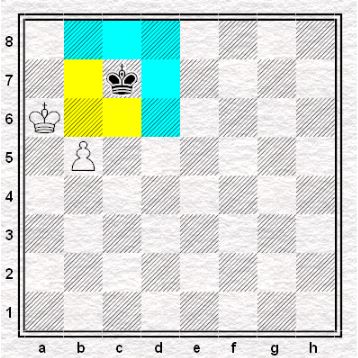
- Kd4
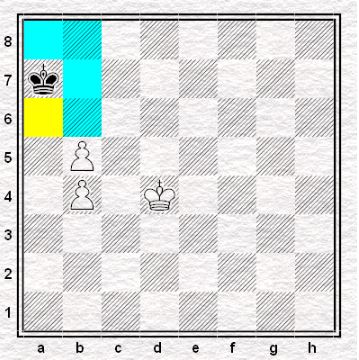
White does not fall for the trap and prepares to jump into c4 if Black moves with Kb6.
- …Kb6
Preventing the White king from going into c5 while threatening to take the pawn. However, take note that thanks to the b4 pawn, the Black king is unable to step on a5 and c5.
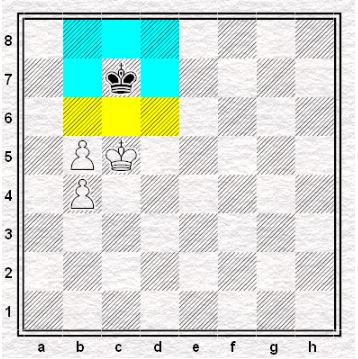
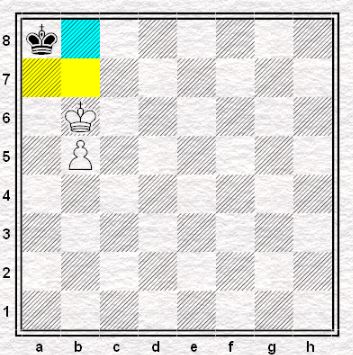
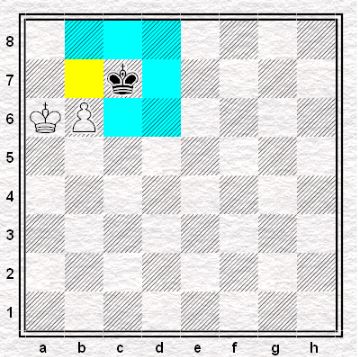
After Kb6, there is only one move to protect the b5 pawn and to prevent a draw.
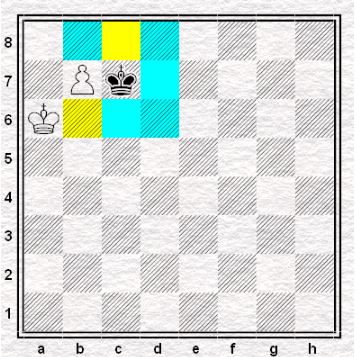
- Kc4
The c4 square is no longer a mined square because the opposing king could not take any pawn on its next move.
- …Kc7
The Black king goes to c7 to gain access to d6 and block off the White king. Thankfully for White, it is their move.
- Kc5
Preventing the Black king from going into b6 or d6.
- …Kb7
Blocking the pawns’ path and looking to move into b6 once again if the White king goes away.
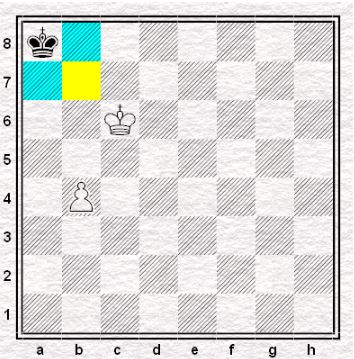
- b6
With this move, Black is forced to pick between the 8th rank or a6 to retreat to.
- …Ka6
Black tries to trick White into a draw. After this move, the only square Black could retreat to is b7.
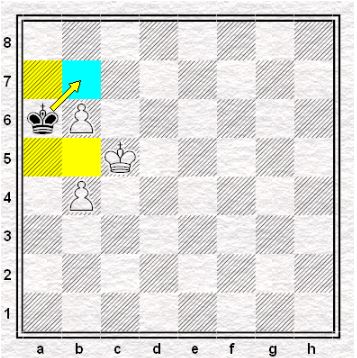
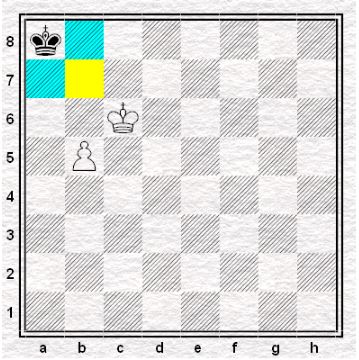
- b7

The only winning move, sacrificing a pawn to gain a positional advantage.
(6. b5+? Kb7 7. Kc4 Kxb6 would be an easy draw for black.)
(6. Kc6?? Is stalemate)
- …Kxb7
Eliminating one of the opponent’s soldiers but White now has complete control of the situation.
(6. …Ka7 would also be losing due to 7. Kc6 Kb8 8. b5 Ka7 9. b8=Q+ Kxb8 10. Kb6 Ka8 11. Ka6 Kb8 12. b5 Ka8 13. b6 Kb8 14. b7 Kc7 15. Ka7 Kd7 16. b8=Q)
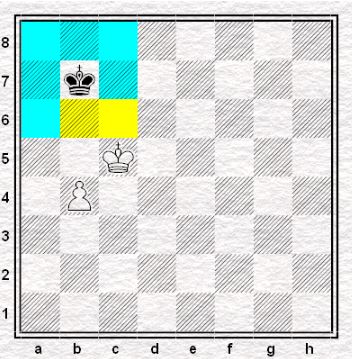
- Kb5
Gaining positional advantage and staying in front of the pawn.
- …Ka7
Sticking close to the edge to raise the chances of stalemate.
(7. …Kc7 is met by 8. Ka6)
- Kc6

Freeing the pawn’s path while making sure to have the White king control more ground.
- …Ka8
Still sticking to the edge, hoping for a draw. However, White could easily avoid that.
- b5
The pawn begins its march.
(9. Kb6 is also winning, trying to limit Black’s activity into the 8th rank.)
- …Ka7
Still hoping to trick White into a draw with 10. b6+? Kb8.
- Kc7
The only winning move. This move also makes it so that the only square Black could retreat to is a8.
- …Ka8
The only move.
Although forced, this opens up a chance for Black to prevent a loss. After Ka8, the only square left for the Black king to retreat to is a7. If White advances the pawn, taking away the a7 square from Black, then the game ends with a stalemate.
- Kb6
Preparing to take control of the a-file by jumping over to a6 next.
(11. Kc6 Ka7 12. Kc7 Ka8 just puts you back into the previous position since 11. Kc6 Ka7 12. b6+? Ka8 13. b7+ Kb8 14. Kb6 would be stalemate.)
(11. b6?? is stalemate)
- …Kb8
Forced.
- Ka6
Looking to step into a7 later on.
- …Kc7
The White king is now free to move into a7 but there’s also another winning move.
(If 12. …Ka8 then White still wins with 13. b6 Kb8 14. b7 Kc7 15. Ka7 Kc6 16. b8=Q)
- b6+
The pawn cannot wait any longer and decides to push forward.
- …Kb8
Blocking the pawn and preventing the White king from going into a7. But the pawn is still eager to march.
- b7
After b7, the Black king only has c7 to escape to.
- …Kc7
Again, the only move. But now, the White king has access to a7.
- Ka7
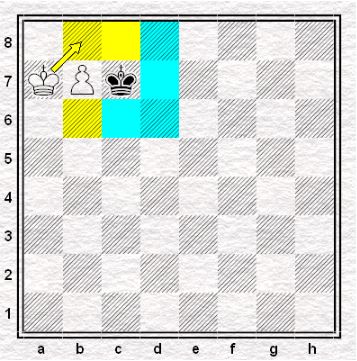
Securing the b8 square for the pawn.
- …Kd7
Any other move would still see the pawn reaching b8.
- b8=Q
What else is there but to promote the pawn? A rook would also be a fine alternative to the queen if you are confident enough.
Although, promoting it into a bishop or knight would just be asking for trouble after all those efforts of avoiding a draw.