Why should I learn them?
Once you “graduate” from learning the basics of Rook endings, you should continue improving by studying the less common ones, but that still make a big difference whenever you find yourself in this type of endgame. A case in point is this instance, where having a previously-acquired understanding of the principles in play makes all the difference between winning or merely drawing when you have the extra pawn.
When do I use them?
In any kind of Rook endings, of course. This particular example? When you have a Rook pawn and Rook against lone Rook and your own piece is located, not as it should be behind the pawn, but in front of it, so that you don’t have time to pull it away in order to free up space for the pawn’s advance. Knowing the proper maneuver’s is important then.
Link to Practice Problems
Step-by-Step Guide on Other Rook endings
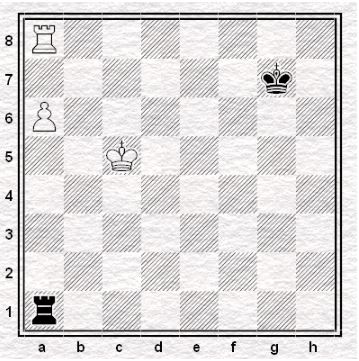
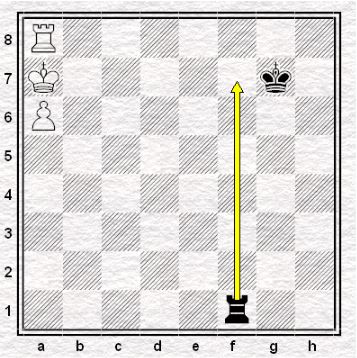
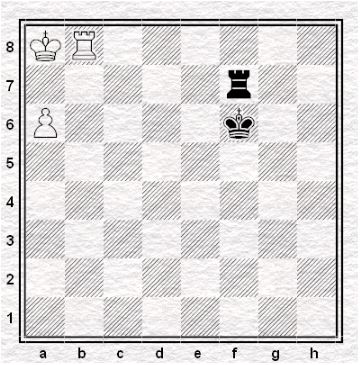
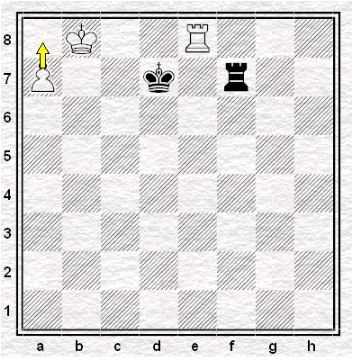
It is White to move. White needs to hide its king in order to prevent a series of checks from Black.
- Kb6
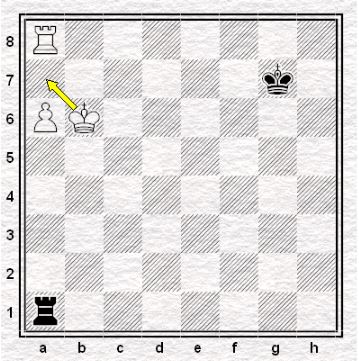
The plan is to hide by using the pawn as a shield.
(1. Kc6 and 1. Kb5 also win but are less direct.)
- …Rb1+
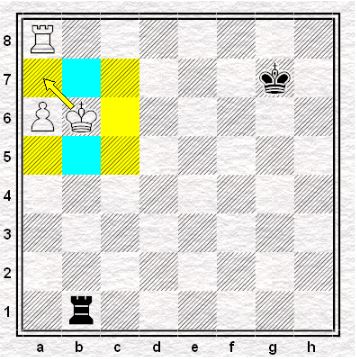
Trying to gain time.
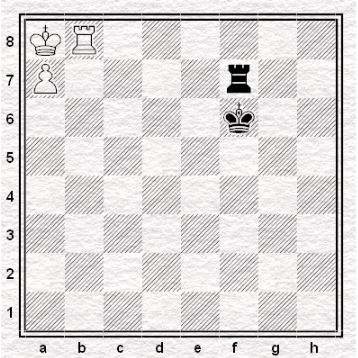
- Ka7
Now the White king is protected from vertical threats.
- …Rf1
Threatening to check via f7.
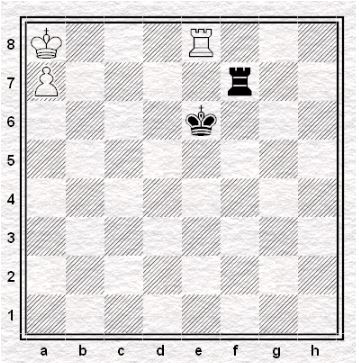
- Rb8
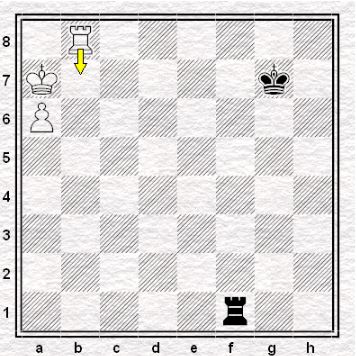
This move makes it so that if Black does check via f7, the White rook would then shield the king and force a rook exchange.
- …Rf6

White wants to move its king to a8 and followed by pawn to a7. This move delays that plan a bit.
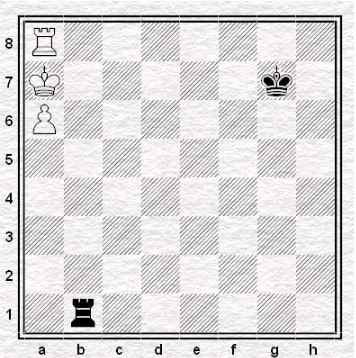
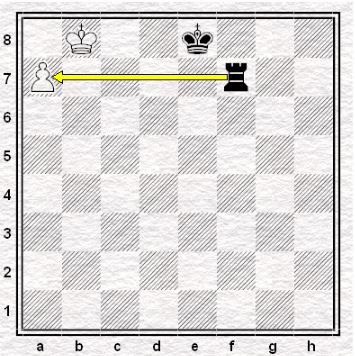
- Kb7
Freeing up the pawn’s path.
- …Rf7+

Now that the White rook can’t block the check, the White king would have to choose a sensible square. Right now the Black rook isn’t threatening the pawn, thus the White king is now free to jump into a8.
- Ka8
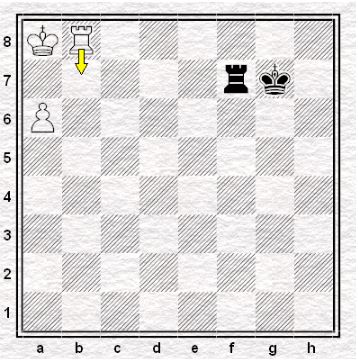
After this move, White is now threatening to force a rook exchange later on.
Other moves on the other hand lets Black give more checks.
- …Kf6
Black wouldn’t let that exchange happen, of course. The Black king left the 7th rank in order not to be pinned by White’s Rb7.
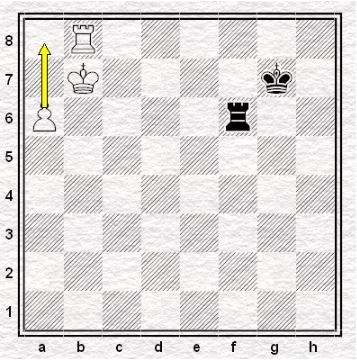
- a7
One more push. All we have to do is wait for an opportunity to remove the king from a8, making sure that Black cannot give effective checks.
- …Ke6

Racing towards the pawn.
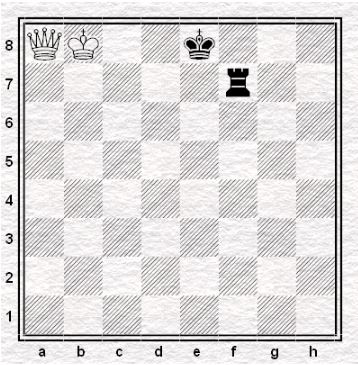
- Re8+
This move lets the White king jump over to b8 on the next turn.
- …Kd7
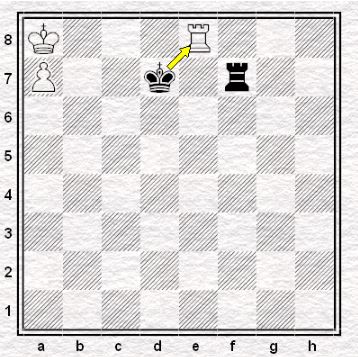
Threatening to take the rook. But White has enough leeway to ignore that.
Any other king move would force Black to take the pawn due to 8. Kb8, threatening to advance the pawn next.
- Kb8
The pawn is now unstoppable.
- …Kxe8
Black took the White rook and now the Black rook is staring down at the pawn. In other words, there is only one thing to do.
- a8=Q
And that one thing to do is to promote the pawn into a queen. Hopefully, White knows how to win a King + Queen vs King + Rook endgame. We’ll tackle that later as we move on.