Why should I learn it?
This is not an endgame that you need to be in a hurry to learn, as it happens only very, very rarely. Not only is it rare, but it is also drawing—if the weaker side knows what it’s doing, that is. If it doesn’t, you can eventually push it into a position similar to the diagram one, when then the only way to win is to understand the maneuvers that are called for.
When do I use it?
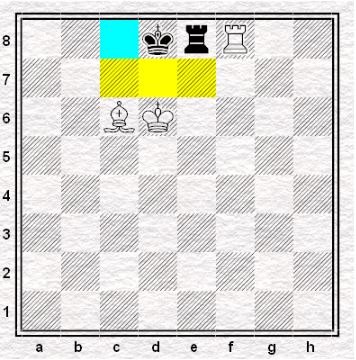
When, being a Bishop up in a Rook vs Rook ending, you manage to corner off the opposing King.
Link to Practice Problems
Rook and Bishop vs Rook problem #1
Step-by-Step Guide on Rook and Bishop vs Rook
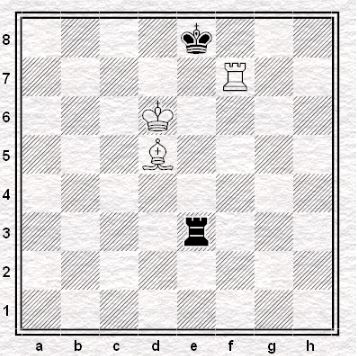
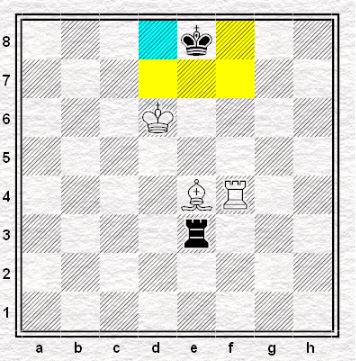
It is White to move. Thankfully for White, the Black king is trapped at the 8th rank. Even the White king is currently protected by the bishop. In this position, the trick is to play the rook to the 4th rank, where it defends the subsequent maneuver bishop to e4.
- Rf4
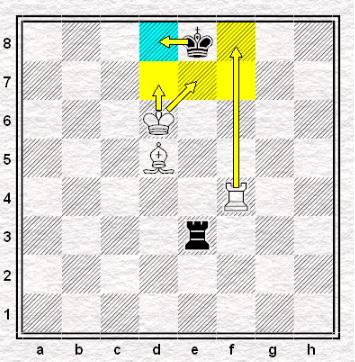
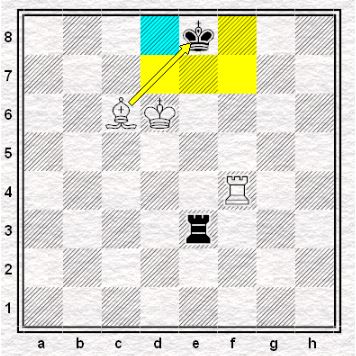
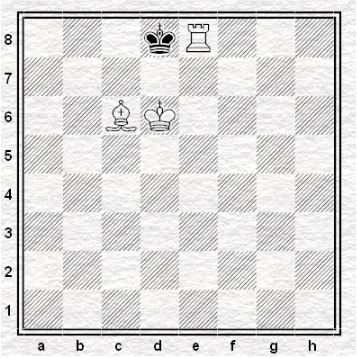
As you can see, despite removing the rook, the Black king still has only one square to go to.
- …Kd8
The Black king is trying to move away from e8 because of Bc6+ which would subsequently result to a checkmate.
(1. …Rd3 is met by 2. Rg4 with threat of mate.)
(1. …Rc3 2. Bc6+ Rxc6 3. Kxc6 and White should win.)
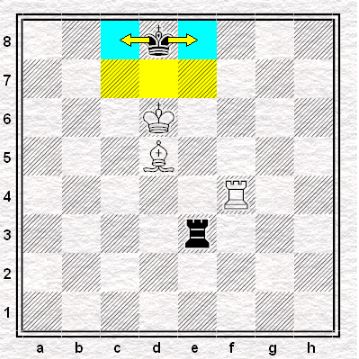
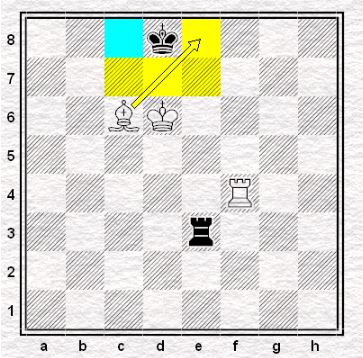
- Be4
Threatening mate with Rf8#.
- …Ke8
Preventing Rf8. As you’ve noticed, the Black king is still unable to run away from the dangerous e8 square.
(2. …Kc8 also leads to mate since the bishop and king controls the 7th rank. 3. Rf8#)
(2. …Rxe4 3. Rxe4 should be an easy win for White.)
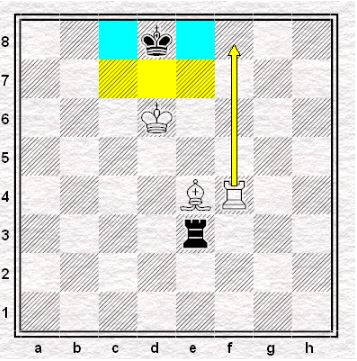
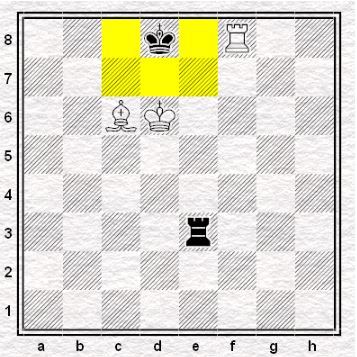
- Bc6+
Take note that the bishop now controls the e8 square and that the Black king only has one square to go.
- …Kd8
Forced.
- Rf8+
The Black king could no longer move. Thus forcing the Black rook to spring into action, albeit a futile effort.
- …Re8
The only move.
- Rxe8#
Checkmate.