Why should I learn it?
This is a concept for Rook endings. Specifically, for those where one side is attempting to promote their only pawn, where the defending side has no pawn at all. Knowing the difference between having the King in the short side (thus allowing the rook to operate on the long one) and otherwise is key both for winning those endgames where you find yourself with the plus pawn, and for successfully defending to a draw those endgames where you are placed in the defender’s position.
When do I use it?
Many, many Rook and pawn vs Rook endgames require this knowledge. Most importantly, when you are defending against a passed pawn in such endings, that’s when it really counts to know where to direct your King and how to best use your Rook.
Link to Practice Problems
Short side – Long side problem #1
Step-by-Step Guide on Short side – Long side
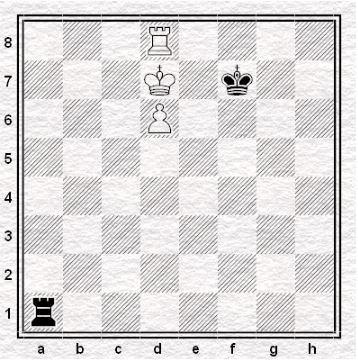
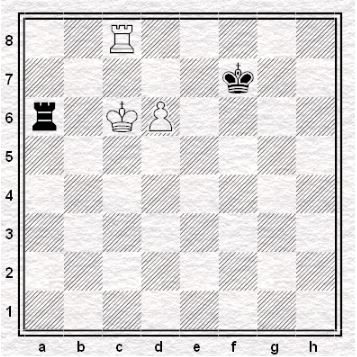
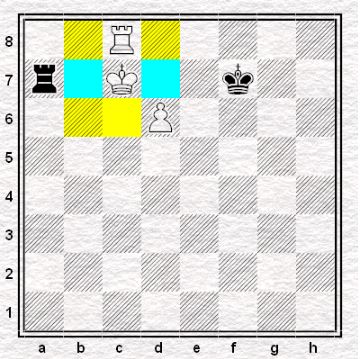
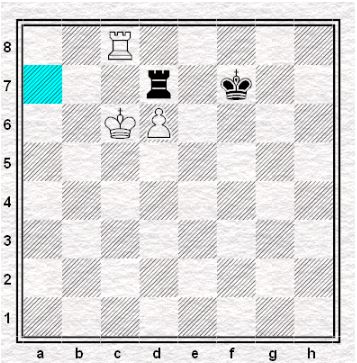
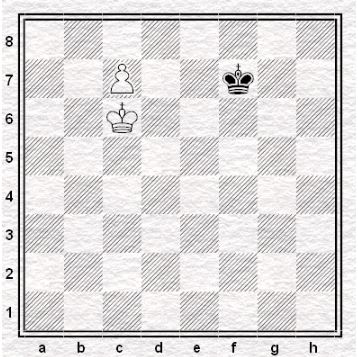
It is White to move. The Black king controls the Long side of the board, in which White is thankful for since that means White could have its king retreat to the Short side and free up the pawn’s path. Take note that being on the Short side helps when one is up against a rook, that’s because the king would have to defend less squares and the enemy rook would also have less mobility.
- Rc8
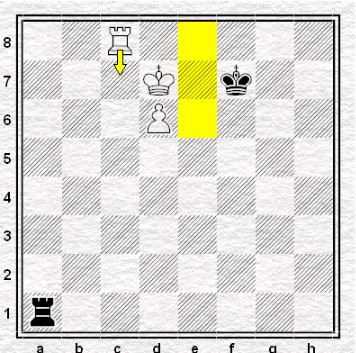
This move has two purposes. (1) Removing the first piece that is blocking the pawn and (2) preparing the rook to go to c7, thus controlling the 7th rank.
- …Ra7+
Black plans to commit a perpetual check and draw.
- Kc6
Now, the second piece blocking the pawn is also gone.
(2. Rc7 also wins but the pawn promotion gets delayed by 2 moves since the king is still at d7. 2. …Ra1 3. Rc8 Ra2 4. Kc7 Rc2+ 5. Kd8 Ra2 6. d7 Ra7 7. Rc5 Ke6 8. Rc6+ Kd5 9. Ke8 Kxc6 10. d8=Q)
- …Ra6+
Continuing with the supposed perpetual check.
- Kc7

Moving away from check while also threatening to advance the pawn.
- …Ra7+
Checked again. However, notice that the king is now a square closer to the Black rook.
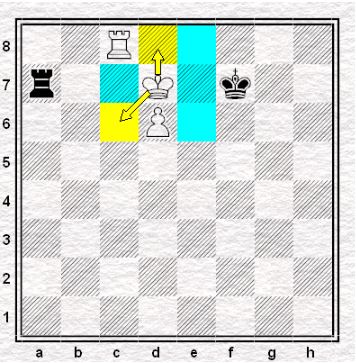
- Kb6
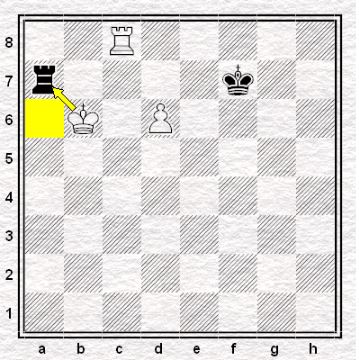
Threatening to take the rook. Since White also has control over a6, Black can no longer give a proper check.
- …Rd7
The only move that stops the pawn’s advance (for the time being).
- Kc6
That now leaves a7 as the rook’s only “safe” square.
- …Ra7
Retreating to that “safe” square and planning to give a check once more. However, it is White’s turn next and White’s rook is itching to jump to c7.
(5. …Ke6 loses the rook after 6. Re8+)
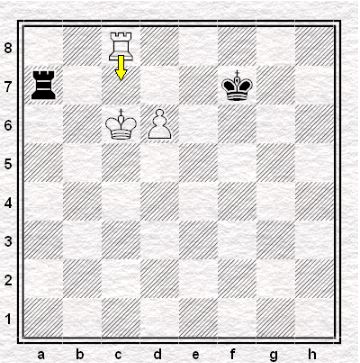
- Rc7+
It is now White’s turn to give a check. This check also acts as a mean to eliminate Black’s pesky rook.
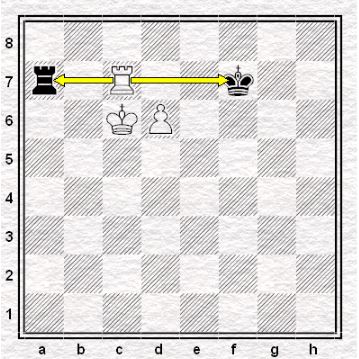
- …Rxc7+
At least taking the rook would ensure that White would not be a rook up.
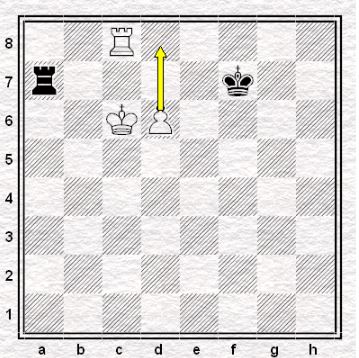
- dxc7
Taking with the pawn makes it closer to promotion.
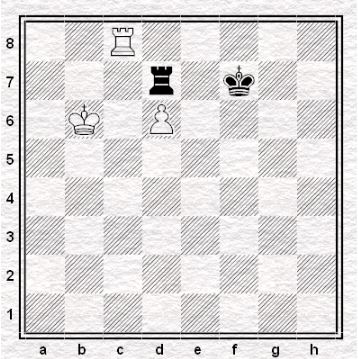
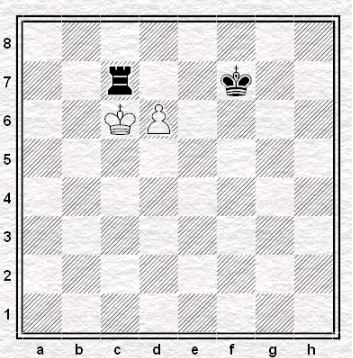
- …Re7

No matter what Black does, the pawn is just unstoppable.
- c8=Q
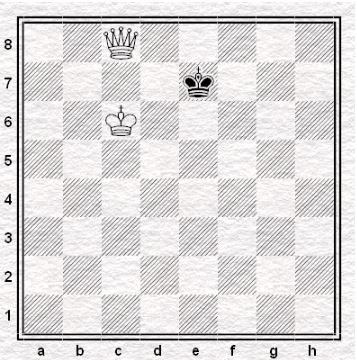
And White should have an easy win.